How do I install and configure my B-box 3 modem
This article will guide you through installing the modem and configuring internet and VoIP services.
Connecting and powering on your modem
- Connect power supply to the modem.
- Connect DSL cable to your telephone socket (TF2007).
- Connect one side of the network cable to the computer and the other side to the modem.
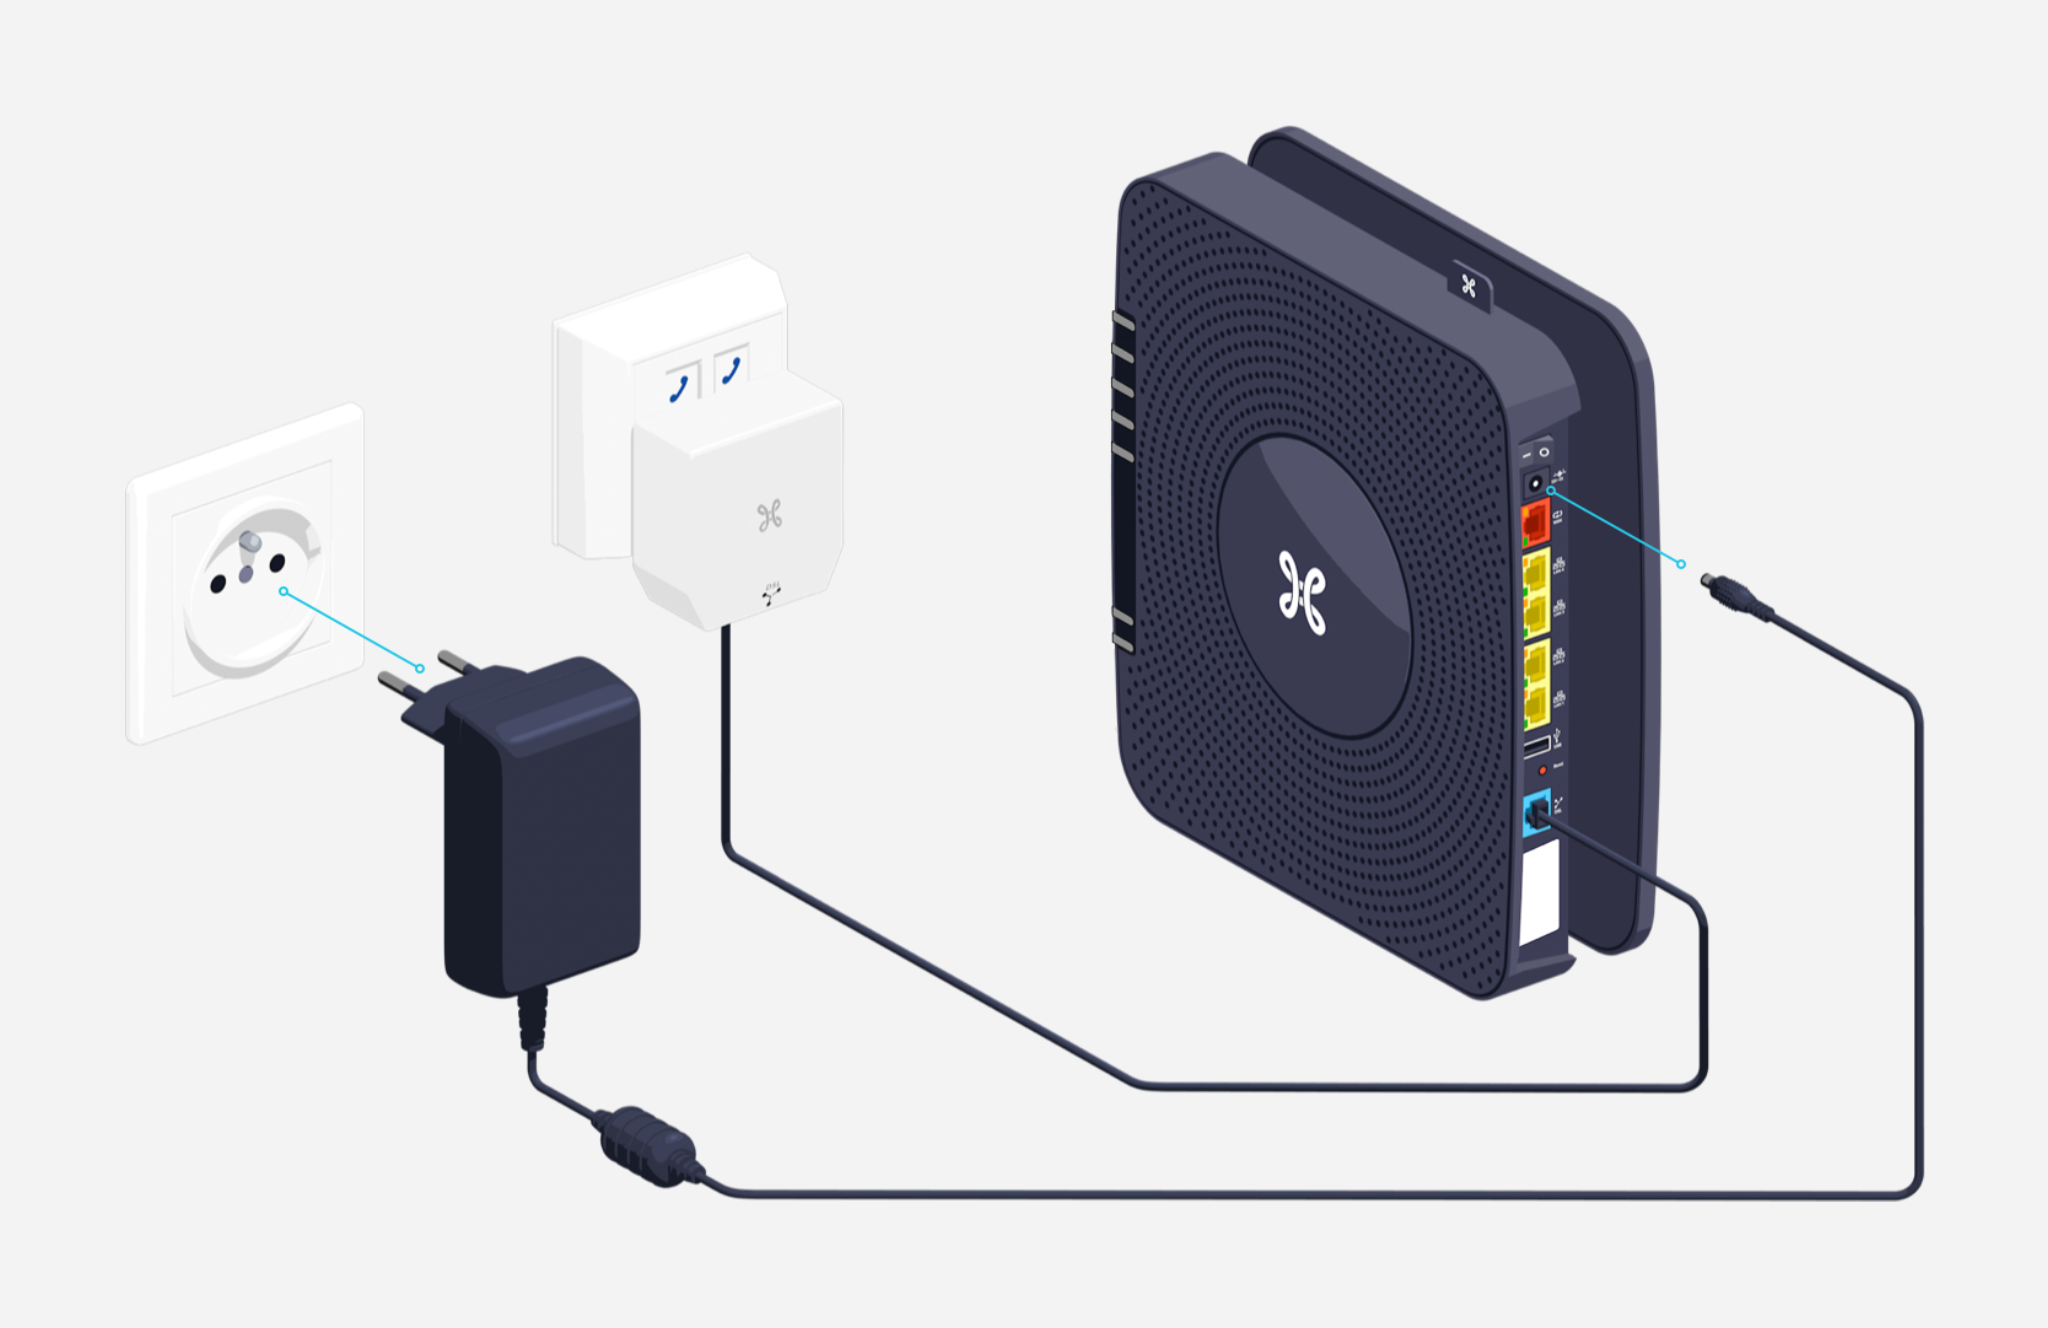
Power on the modem by pushing the button at the backside (the most left one). After a selftest it's ready to be configured (the modem can reboot several times during first use, this process can take several minutes).
LED indicators

| POWER | |||||||
| Blue solid | The modem is turned ON and ready for operation | ||||||
| Off | The modem is turned OFF | ||||||
| DSL | |||||||
| Blue solid | The modem is synchronized | ||||||
| Blue flashing | The modem is initializing the DSL line | ||||||
| Off | The DSL link is down | ||||||
| Internet | |||||||
| Blue solid | PPP session is established | ||||||
| Red solid | PPP session is not established (username/password error) | ||||||
| Off | No PPP session is configured | ||||||
| LAN | |||||||
| Blue solid | At least one device is connected to one of the LAN ports and turned ON | ||||||
| Off | No device is connected (or it’s connected and turned OFF) | ||||||
| Phone1, Phone2 | |||||||
| Blue solid | The VOIP account is configured properly and ready for use | ||||||
| Red solid | The VOIP account isn't configured correctly | ||||||
| Off | No VOIP account is configured | ||||||
| WPS | |||||||
| Blue flashing | WPS is activating | ||||||
| WiFi | |||||||
| Blue solid | WiFi is enabled in the modem | ||||||
| Blue flashing | WiFi is being used | ||||||
| Off | WiFi is disabled | ||||||
| ETH1-ETH4 | |||||||
| Green solid | Network cable is connected to the port and to the management computer switched on. | ||||||
| Green flashing | Network cable is connected to the port and there is a traffic between modem and computer. | ||||||
| Off | Network cable is not connected to the port or the management computer is switched off. |
1. Connecting to modem interface
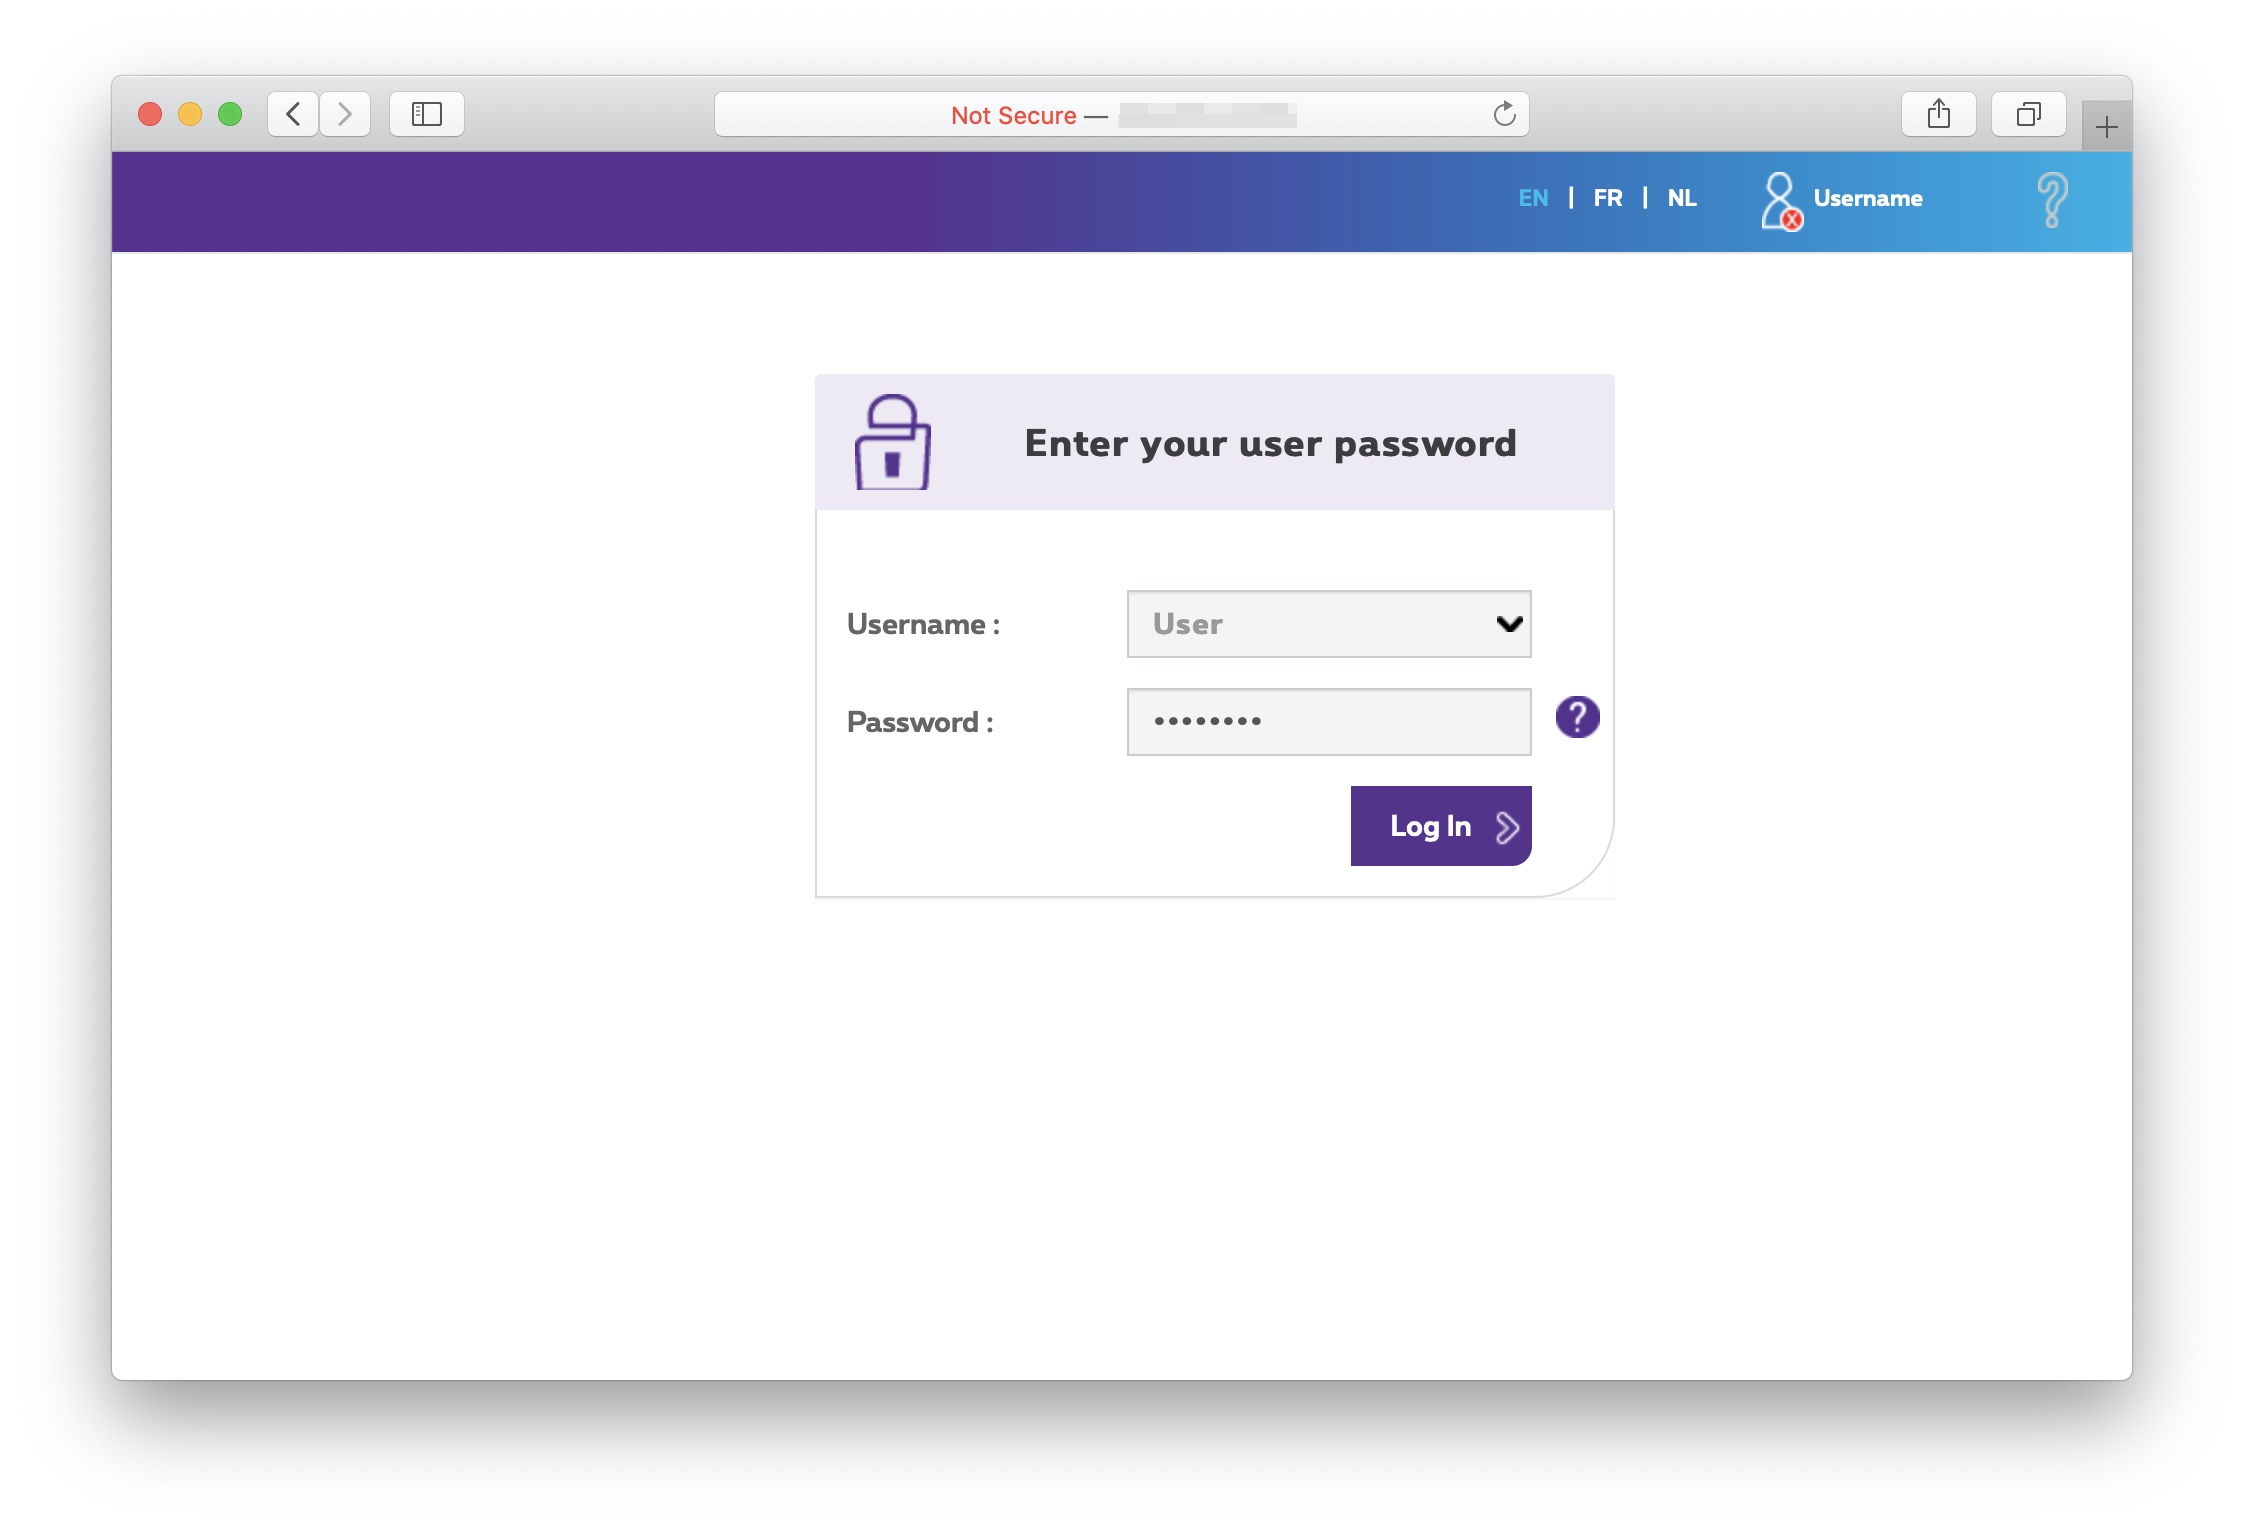
Start a web browser (e.g. Internet Explorer, Chrome, Mozilla Firefox, ...). Enter the default interface address http://192.168.1.1 as the website address.
B-box 3 is protected by default. The default password is printed on a label on the back side of the device.
Select User and introduce a password (case sensitive) printed on a sticker. Click on Log in.
2. Setting up your internet connection
In order to configure the PPP connection you should take the following steps:
Select Network Connectivity and click on under the sub menu Internet.
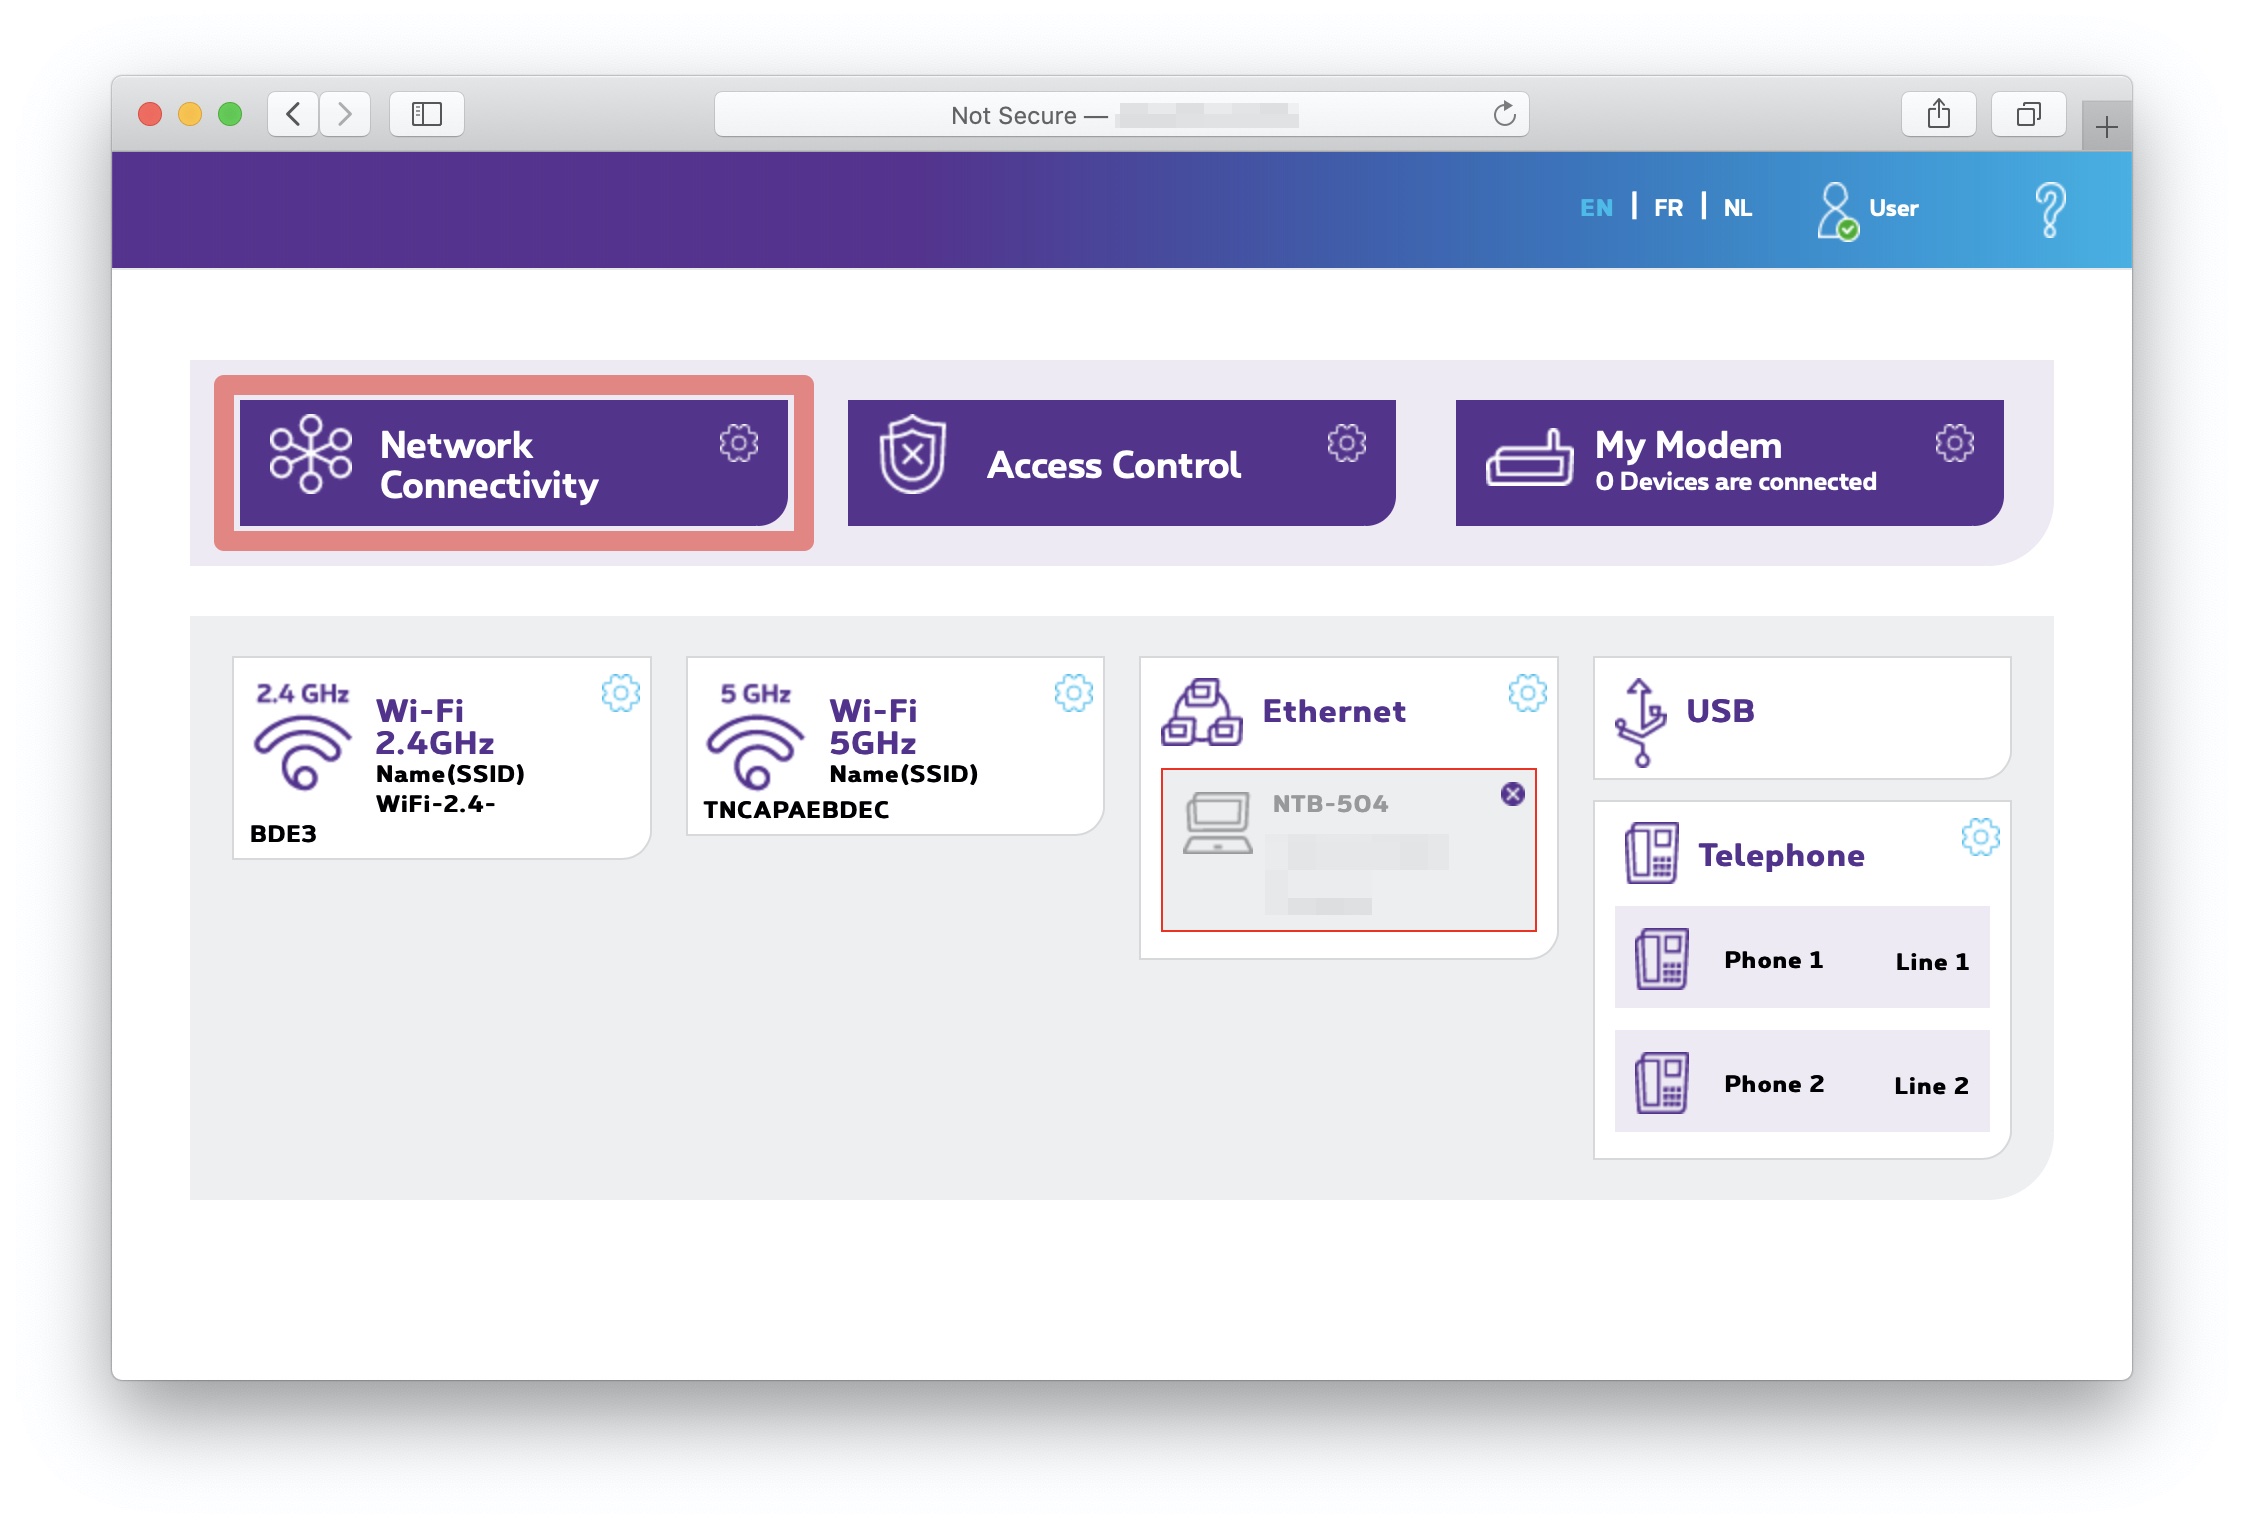
You will see the following unfolding menu.
The modem is by default in bridge mode. You have not only to type your username and password, but also enable PPP (select Enable in the menu below).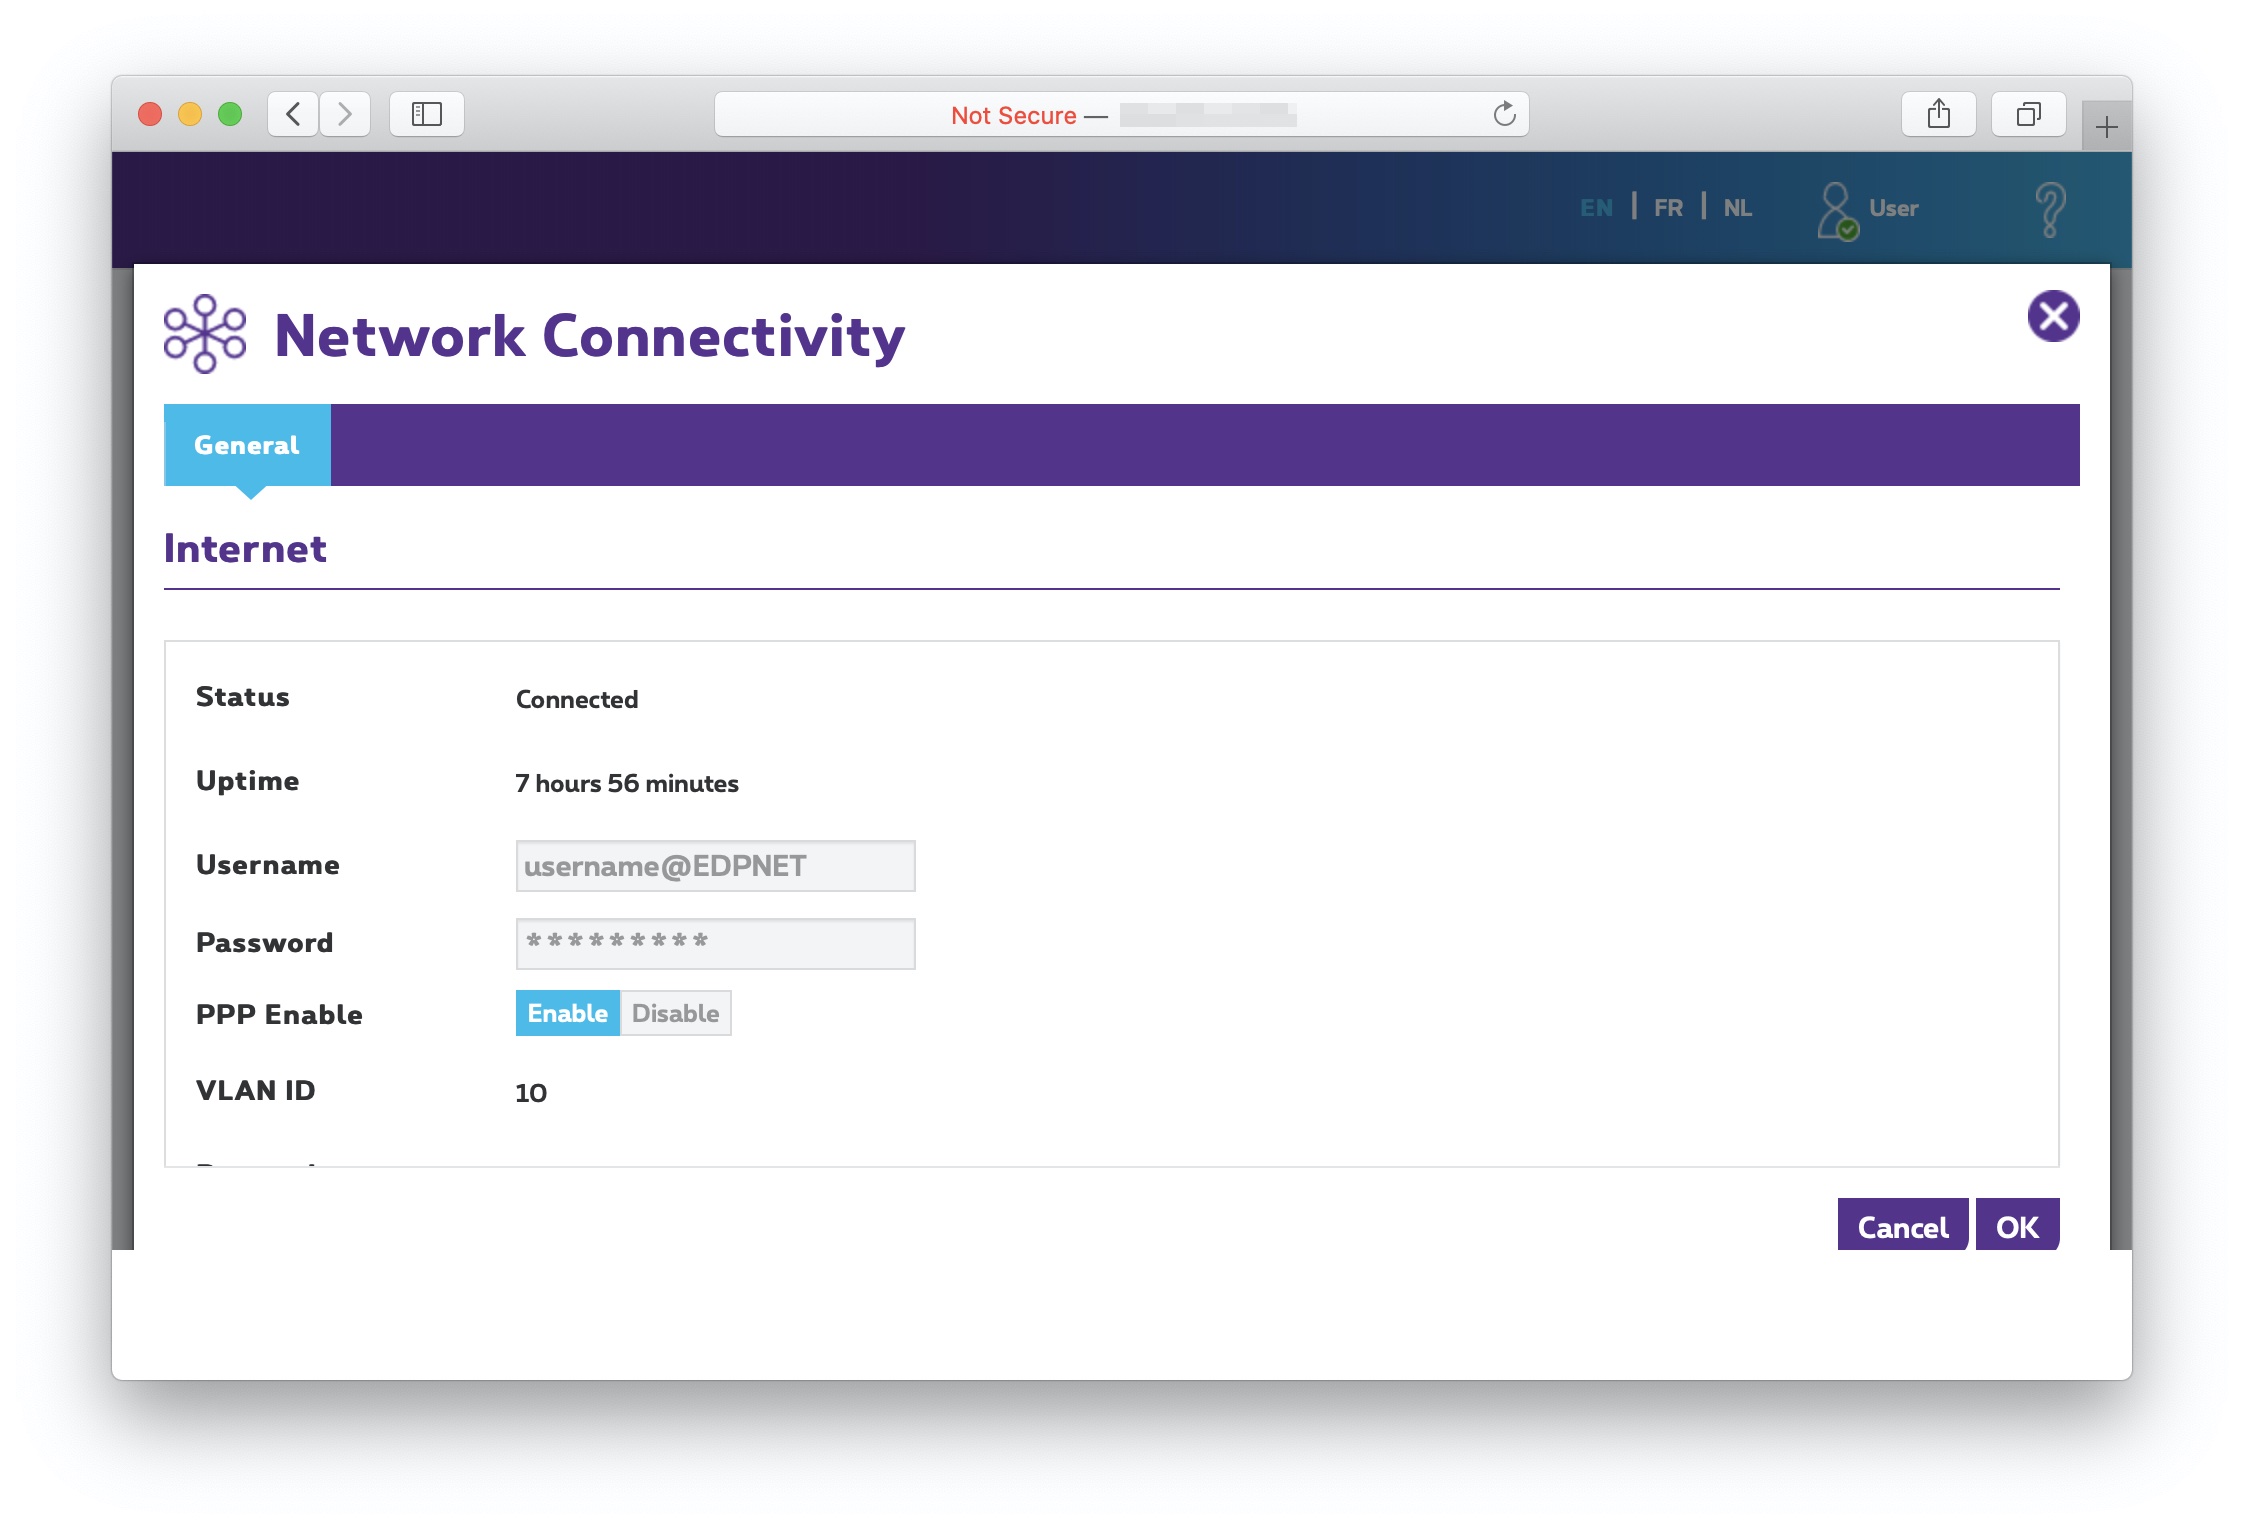
Click once it’s done.
You will be redirected to the main menu. If you click back on Network connectivity you will see that the modem is connected. You can also see an IP address that you have received:
3. Setting up your edpnet telephony
In the main menu select Telephony or click on :
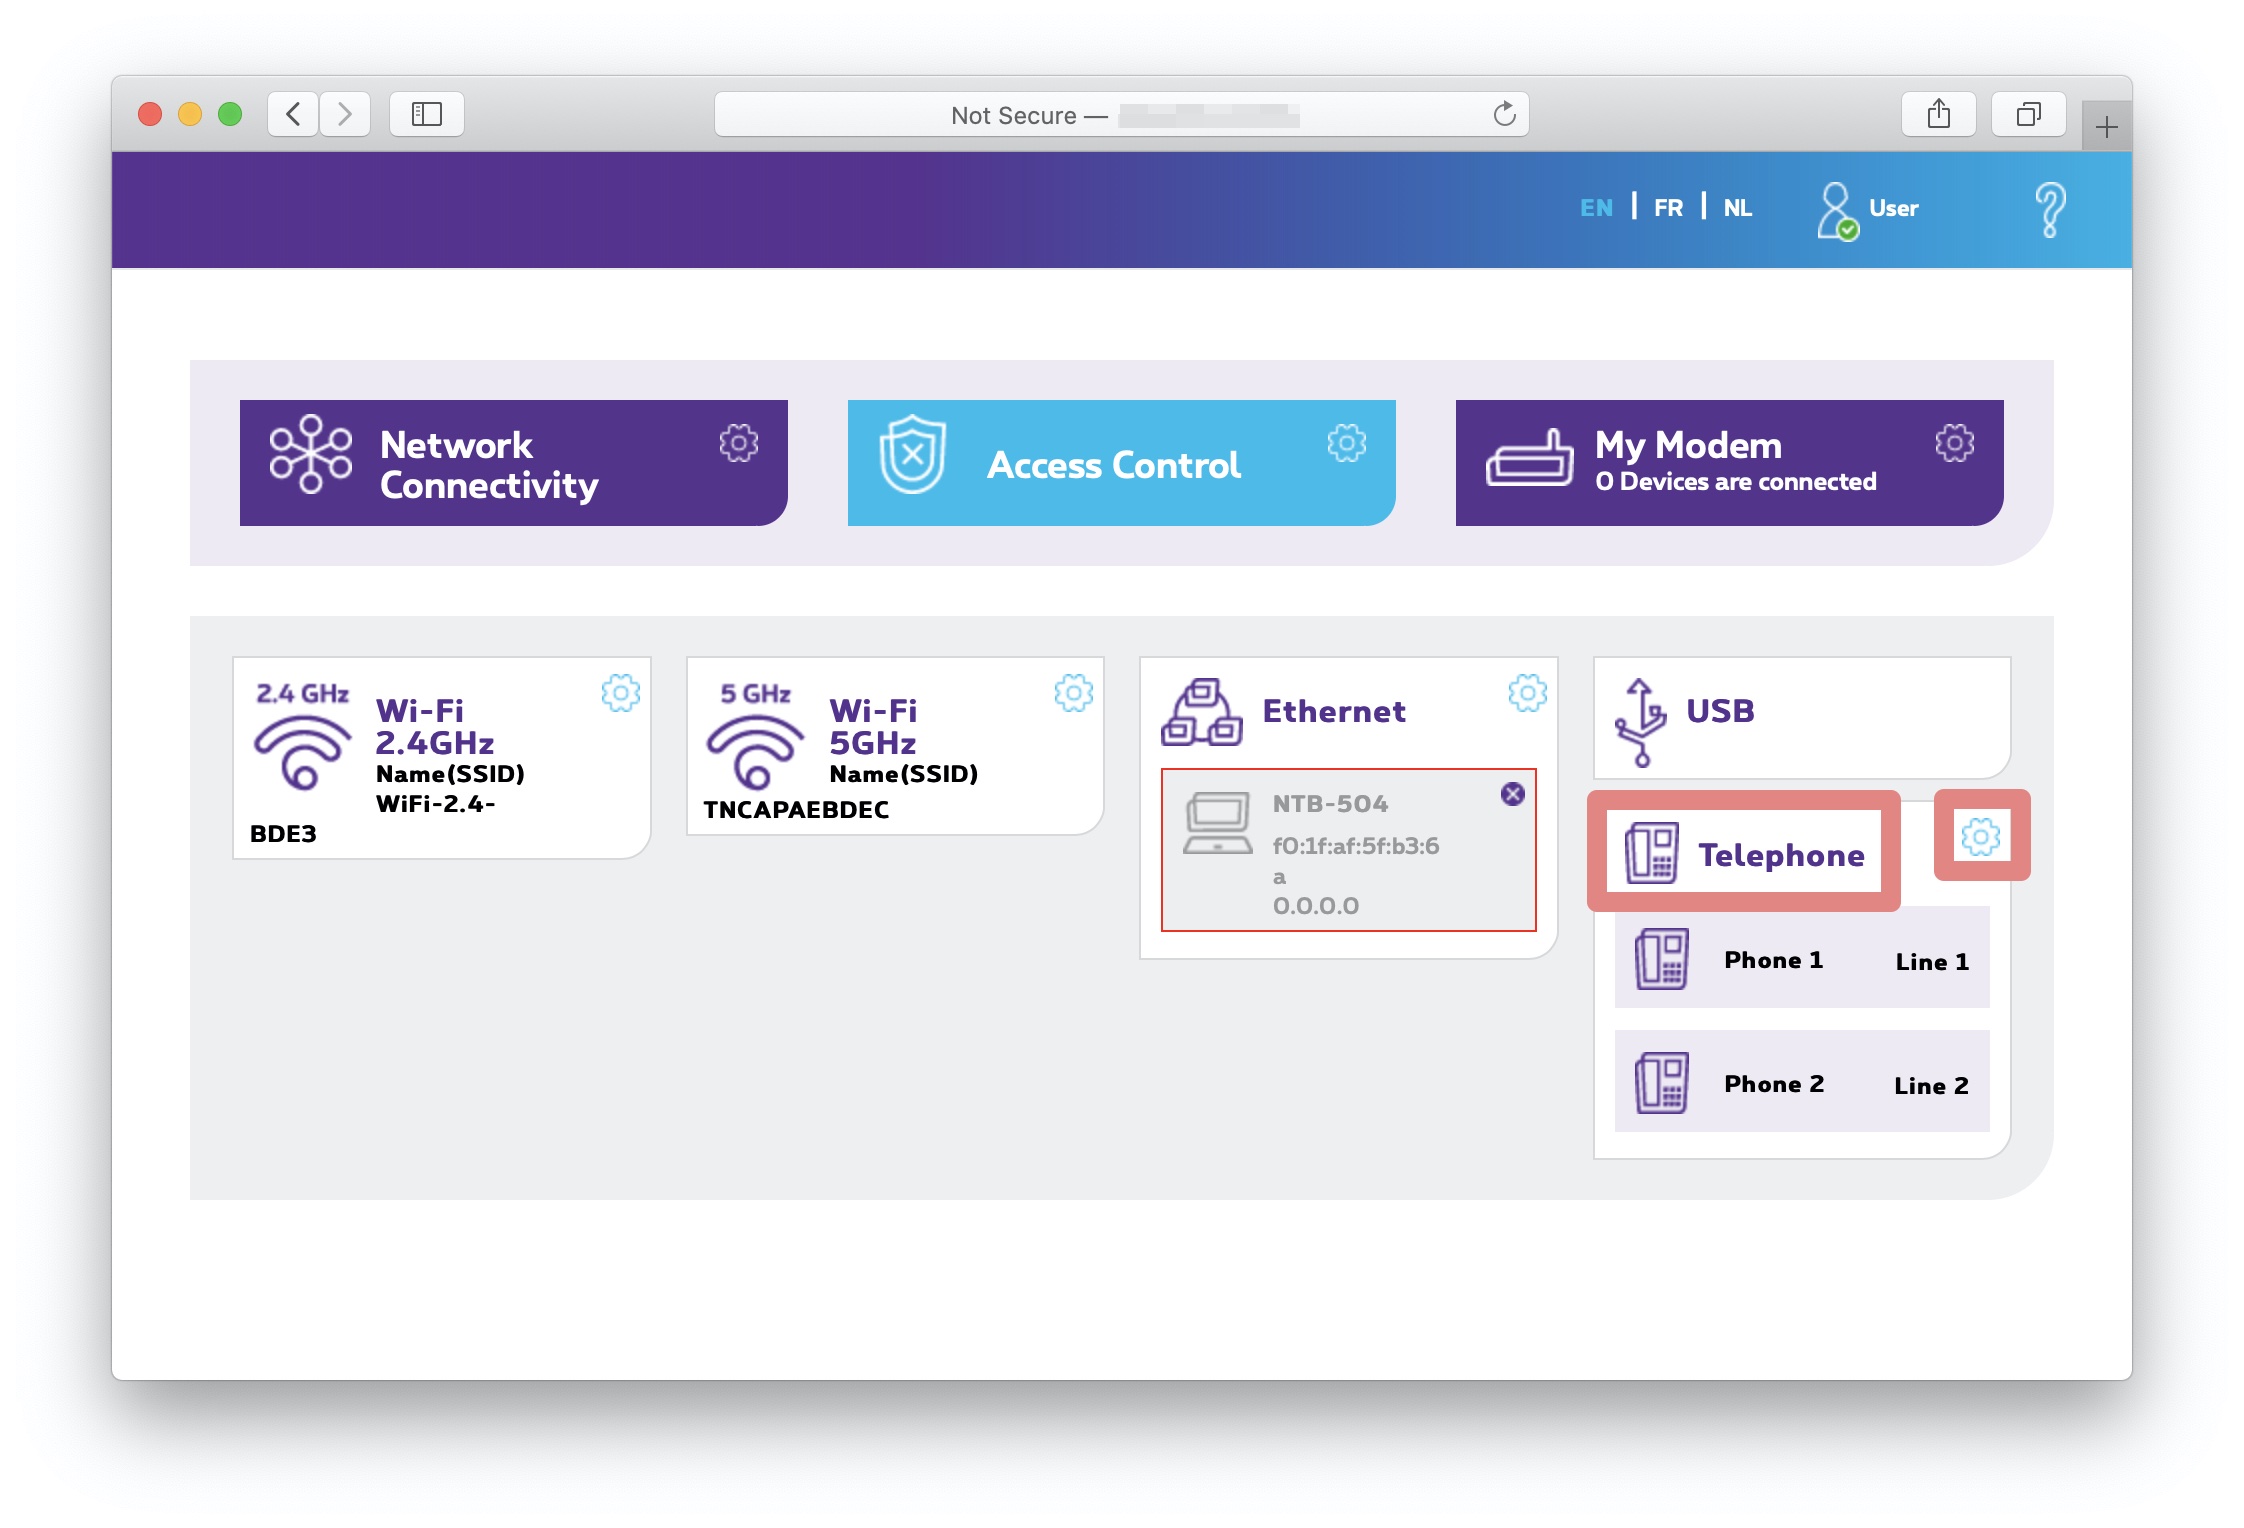
First of all, you should select Enabled on top.
After that, enter the complete configuration for your VoIP telephone number:
- Domain: sip.edpnet.be
- Telephone no: your phone number
- Username: your phone number
- Password: the password provided by edpnet
- Transport: UDP
- Port: 5060
Click at the bottom right.
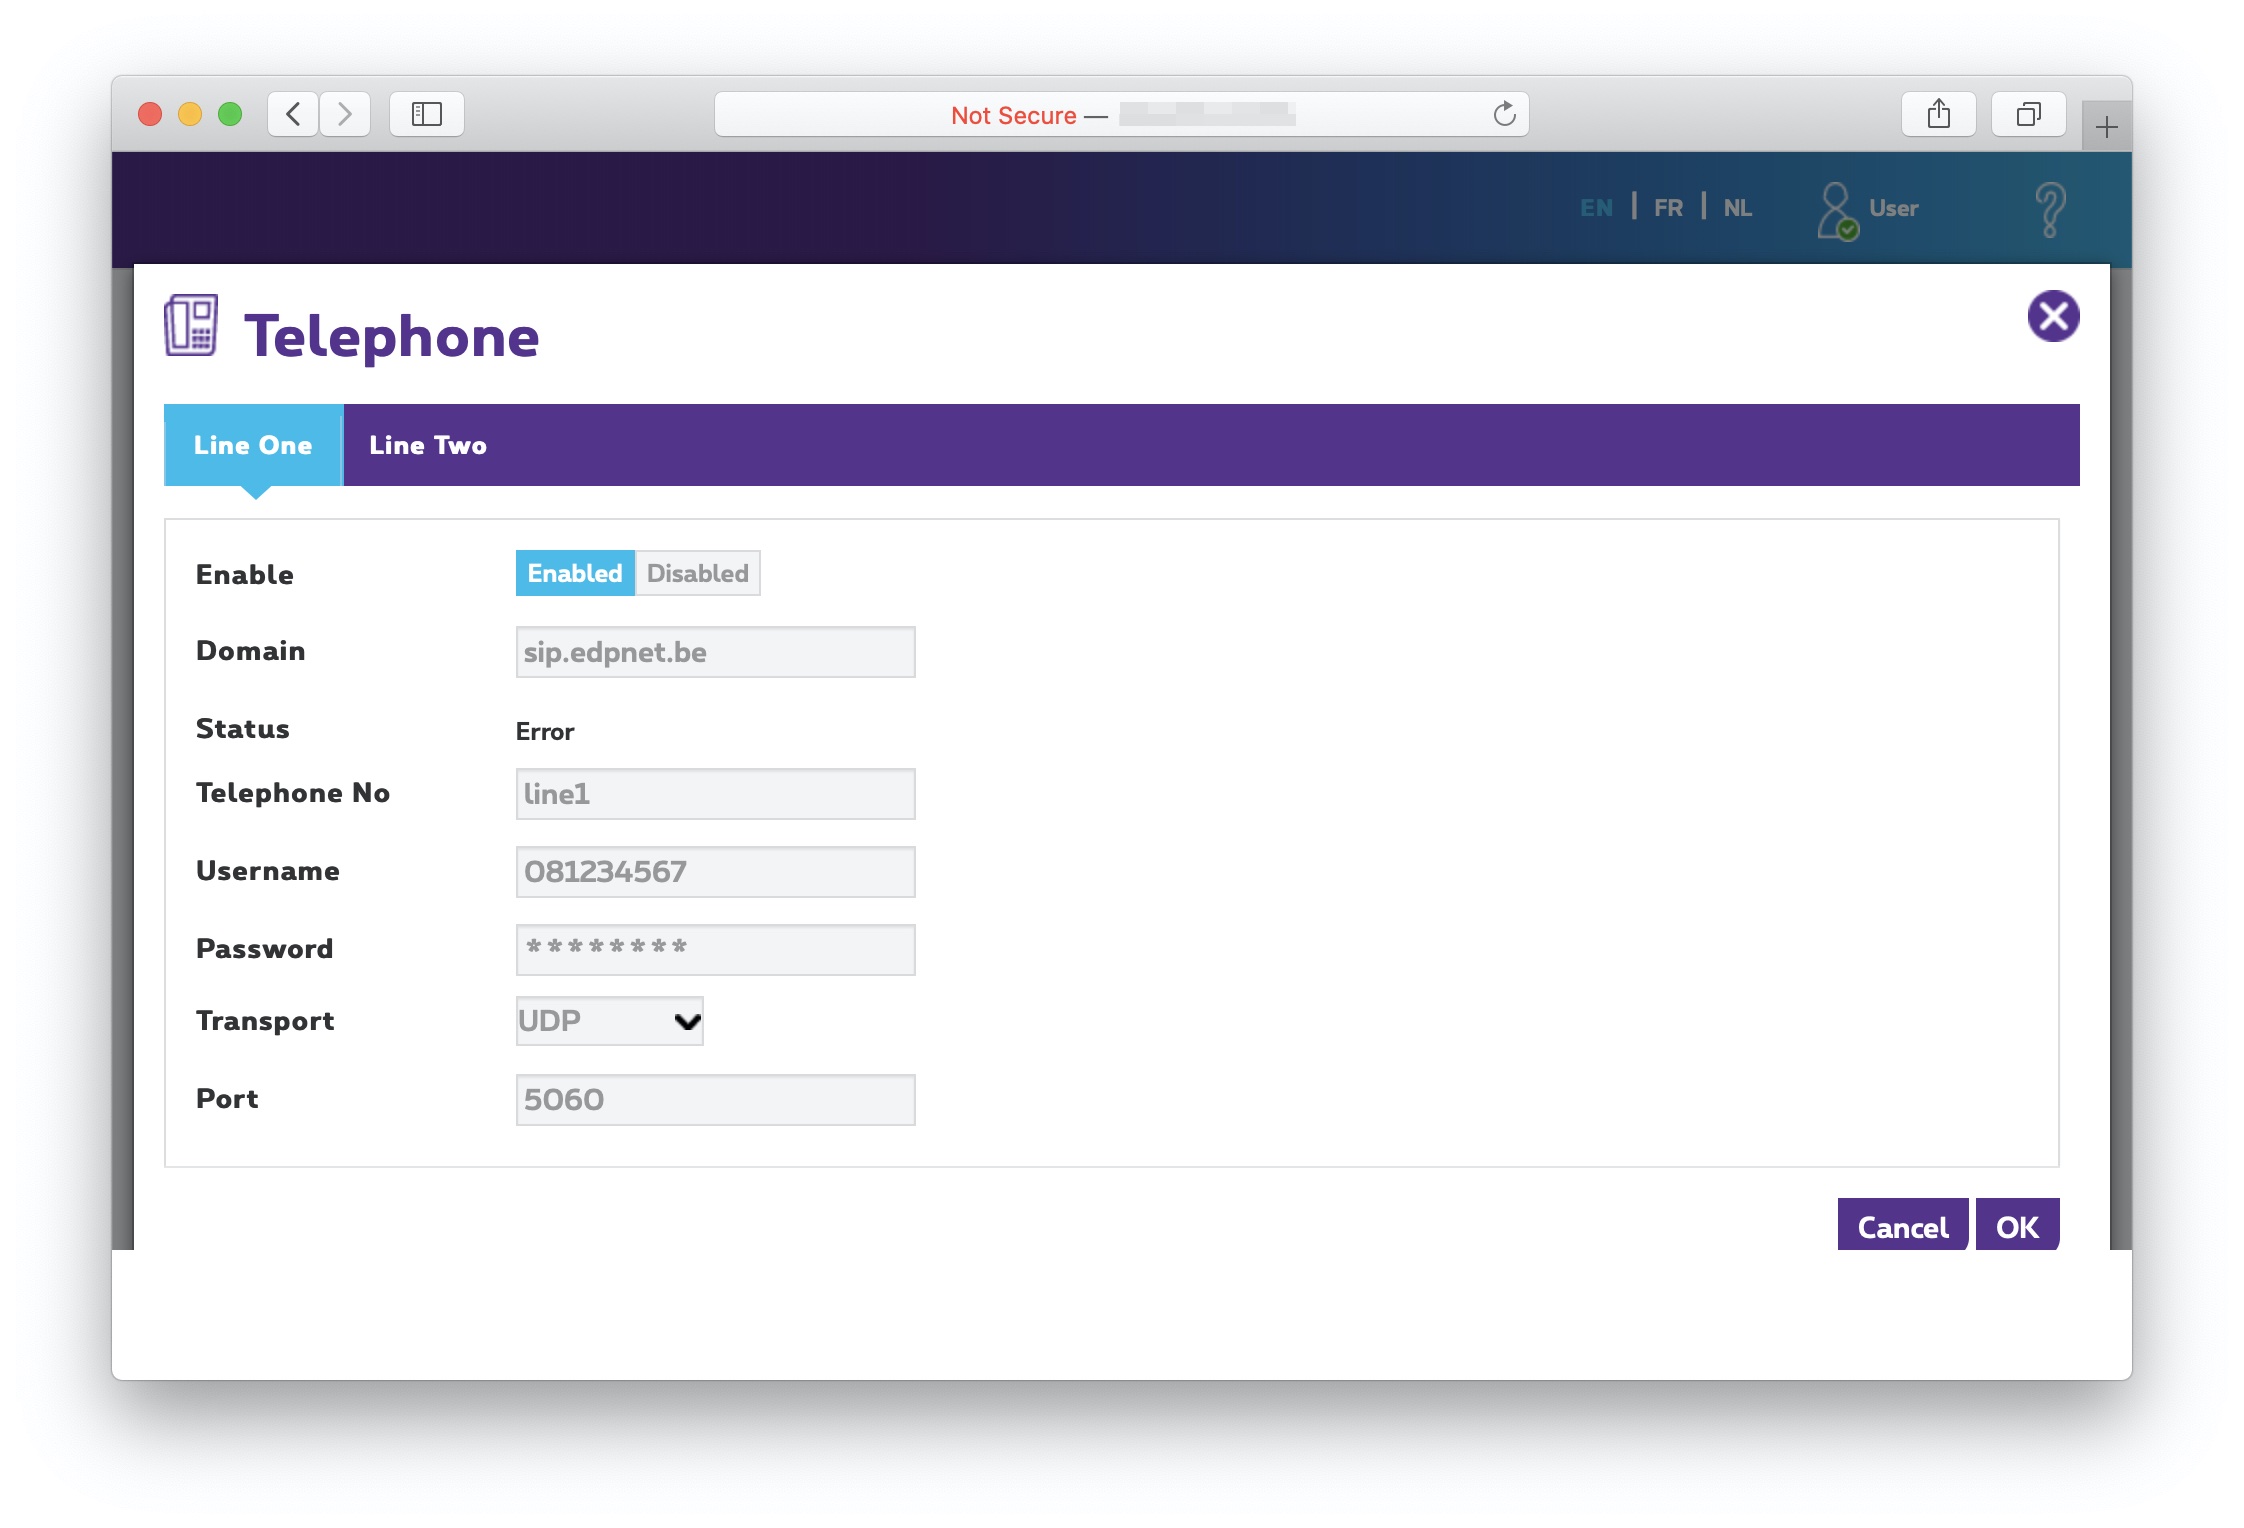
Once it’s done you will be redirected to the main menu. If you click back on Telephony, you will see that the line status is now UP.
